
I wanted to play with several technologies in this project. First thing I wanted to see is how to do the authentication configuration in the Flutter application. I focused only on Flutter For Web although the project should be able to run on other platforms too. I used Keycloak as the authentication and authorization server. Keycloak can be safely treated as a swiss army knife when it comes to authorization and authentication. The last topic is the method of authorization using the JWT token in the application that will be used as an API (or resource server). I’m using Kotlin, Spring Boot, Web Flux, and the Spring Boot Oauth2 Resource Server starter library. All the source code can be found in my repository GitHub account.
The entire project can be run using docker-compose:
version: "3.7"
services:
  flutter-kotlin-api:
    container_name: flutter-kotlin-api
    image: flutter-kotlin-api
    environment:
      - SPRING_SECURITY_OAUTH2_RESOURCESERVER_JWT_JWK_SET_URI=http://flutter-kotlin-keycloak:8080/auth/realms/kotlin-flutter-demo-realm/protocol/openid-connect/certs
    ports:
      - "8080:8080"
  flutter-kotlin-gui:
    container_name: flutter-kotlin-gui
    image: flutter-kotlin-gui
    ports:
      - "80:80"
  flutter-kotlin-keycloak:
    container_name: flutter-kotlin-keycloak
    image: jboss/keycloak:12.0.3
    environment:
      - KEYCLOAK_USER=admin
      - KEYCLOAK_PASSWORD=admin
      - KEYCLOAK_IMPORT=/tmp/realm-export.json
    ports:
      - "8081:8080"
    volumes:
      - ./keycloak-docker/realm-export.json:/tmp/realm-export.json
but let’s discuss the components of the project ![]()
Keycloak
Keycloak is an open source software product that allow single sign-on with identity and access management. For the purpose of this application it will serve as an authentication/authorization server. The entire authentication and authorization process will consist of the following steps:
- The user who want to access
/securedendpoint need to first log in using login page. - Username and password is authenticated using Keycloak API
- After successfull logging in, Keycloak returns the JWT token.
- User can now attempt to enter
/securedendpoint using a JWT token. - The API server checks the signature of the JWT token with the public endpoint in Keycloak and authorize the action.
In prepared
docker-composeconfiguration you can saw section with Keycloak and its configuration. Configuration is imported at container startup (seerealm-export.json), the file contains the configuration of the entire realm, including client, role and user (username ->user, password ->password). If you want to view the Keycloak configuration, you can do it by entering the administrator console. Keycloak administrator username and password are configured indocker-compose: ``` … environment:- KEYCLOAK_USER=admin
- KEYCLOAK_PASSWORD=admin
…
```
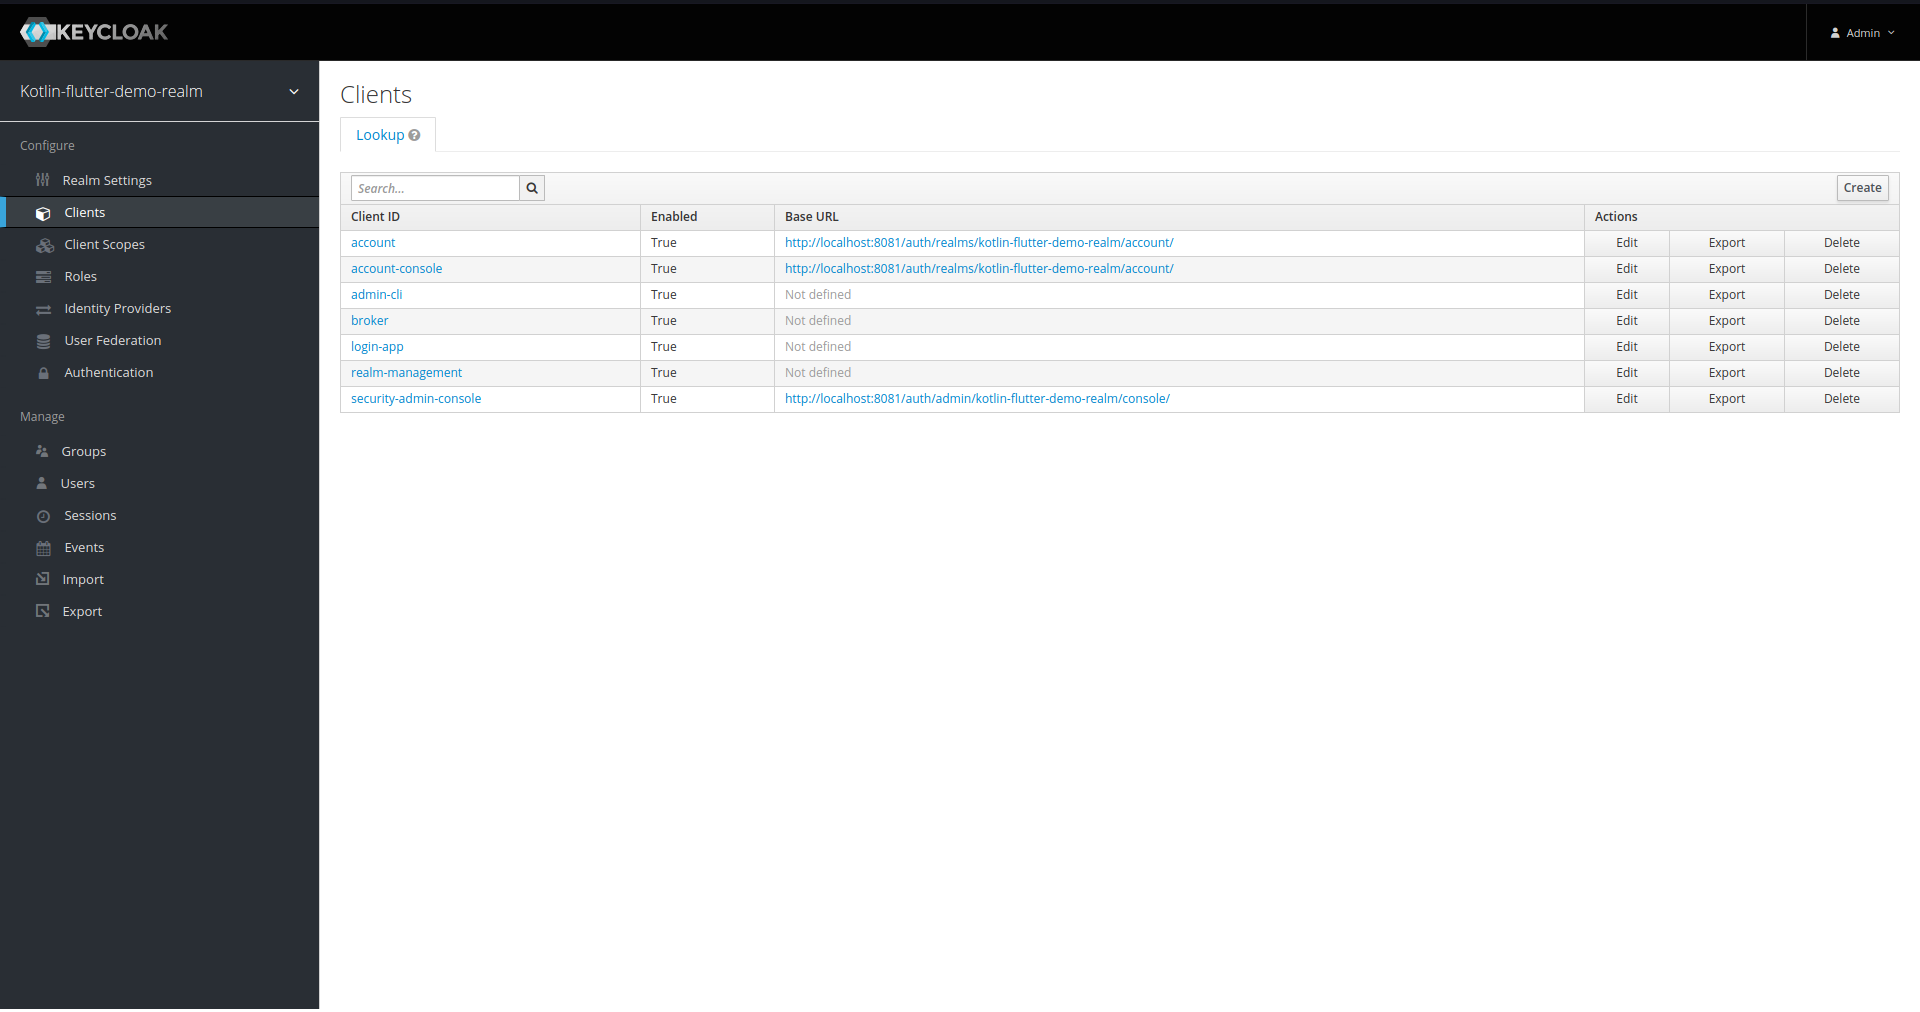
In the Keycloak configuration the most important thing for us is the configuration of the client. Go to
Clientsand chooselogin-appfrom the list. The imported configuration should look like this:
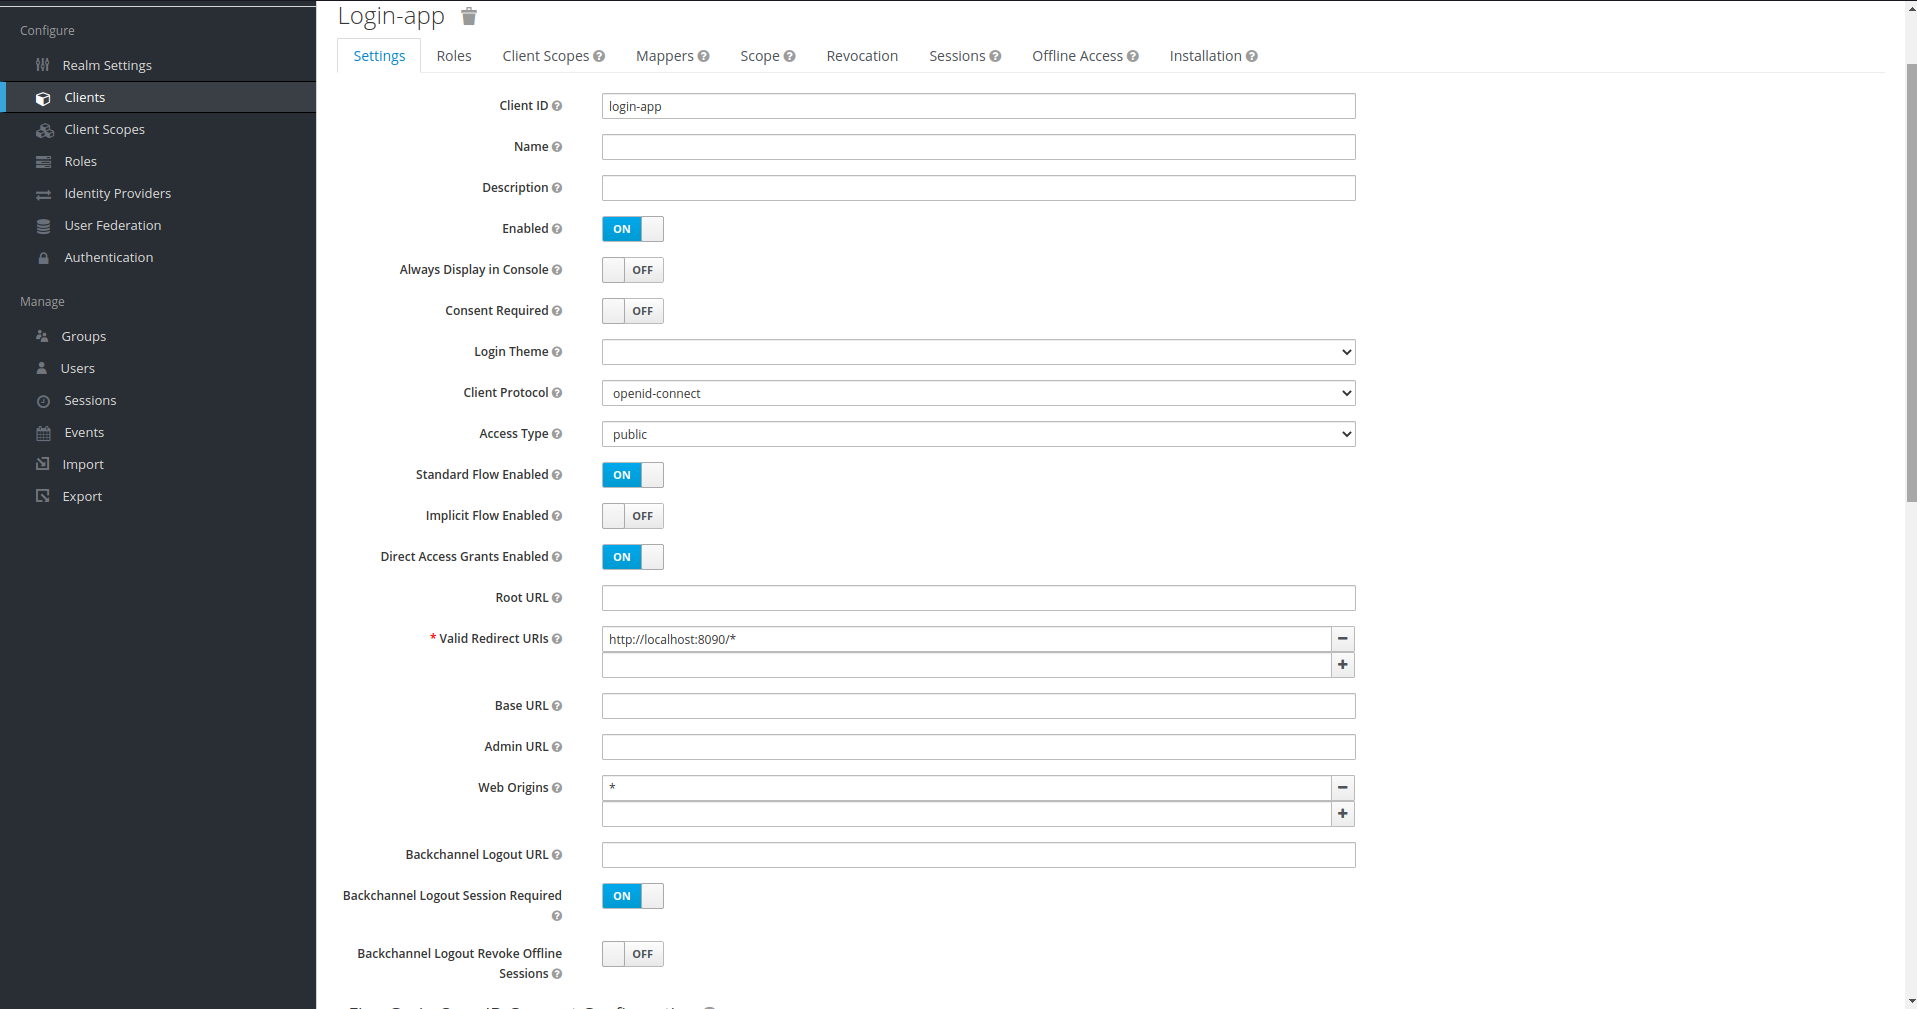
Note the configuration of Valid Redirect URIs and Web Origins. The first is important when we use the Keycloak login page to authenticate the user(I am not discussing this approach in this post). The second indicates domains that can request Keycloak API (CORS). If the application that is our GUI is running on the same domain as the keycloak then you do not need to configure anything here. Otherwise, enter a specific domain name. The current value of * (which means that every domain had access) is not safe and may only be used for development purposes ![]()
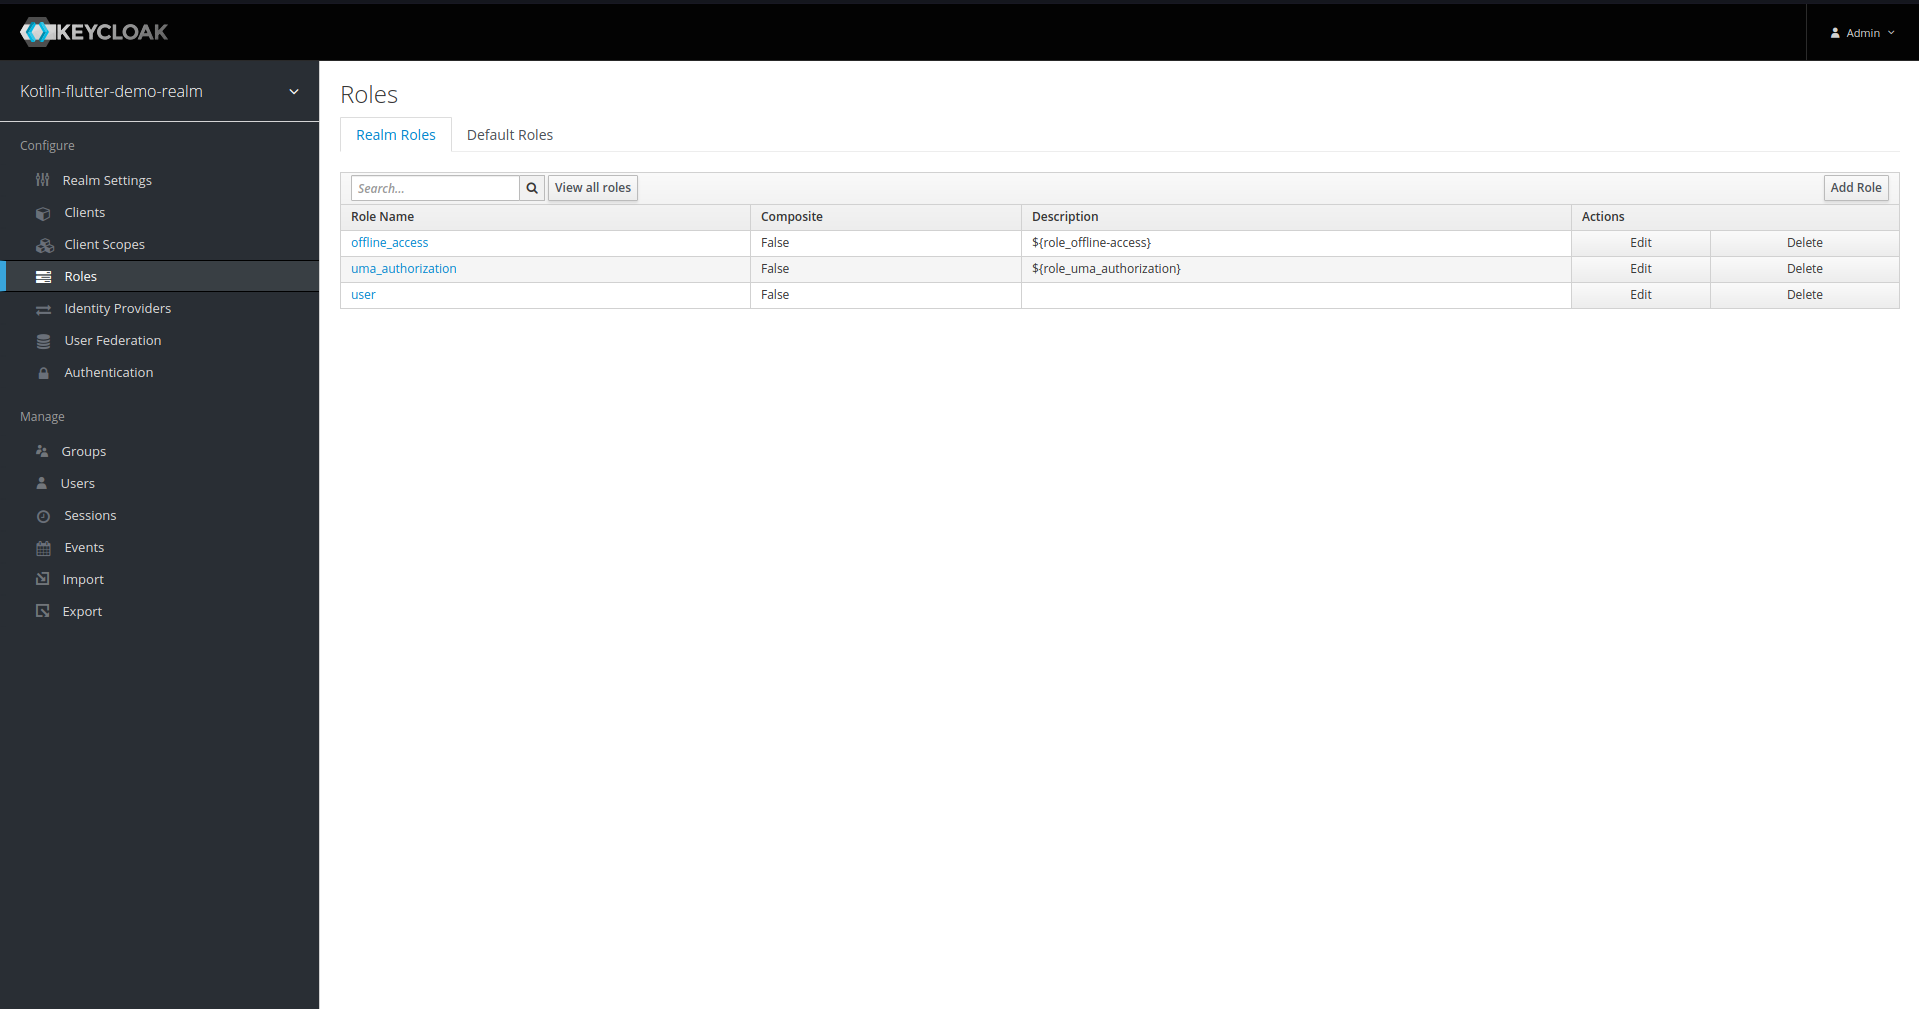
Entering Roles we can also see one added user role:
If you want to get more information about Keycloak configuration read about it e.g. Keycloak docs , Baeldung blog
Flutter application
Flutter is quite a new framework, and an even newer part of it is dedicated to web development.
To start playing with Flutter, install it on your system according to the instructions on this page. And to add web support, follow the instruction on this page. Currently, Flutter 2 already supports web development in stable version (until recently only in beta). If you are using Flutter in version below 2 you need to issue following commands before creating a flutter project:
 flutter channel beta
 flutter upgrade
 flutter config --enable-web
Running flutter channel beta replaces your current version of Flutter with the beta version which supports web development.
Then all you have to do is run flutter create myapp to create application scaffold.
Let’s move on to the application itself. The libraries necessary for the project to run are listed in the pubsec.yaml file:
name: gui
description: A new Flutter project.

# The following line prevents the package from being accidentally published to
# pub.dev using `pub publish`. This is preferred for private packages.
publish_to: 'none' # Remove this line if you wish to publish to pub.dev

# The following defines the version and build number for your application.
# A version number is three numbers separated by dots, like 1.2.43
# followed by an optional build number separated by a +.
# Both the version and the builder number may be overridden in flutter
# build by specifying --build-name and --build-number, respectively.
# In Android, build-name is used as versionName while build-number used as versionCode.
# Read more about Android versioning at https://developer.android.com/studio/publish/versioning
# In iOS, build-name is used as CFBundleShortVersionString while build-number used as CFBundleVersion.
# Read more about iOS versioning at
# https://developer.apple.com/library/archive/documentation/General/Reference/InfoPlistKeyReference/Articles/CoreFoundationKeys.html
version: 1.0.0+1

environment:
  sdk: ">=2.7.0 <3.0.0"

dependencies:
  flutter:
    sdk: flutter
  http: 0.13.0
  flutter_flavor: 1.1.3

  # The following adds the Cupertino Icons font to your application.
  # Use with the CupertinoIcons class for iOS style icons.
  cupertino_icons: ^1.0.0
  shared_preferences: ^2.0.3

dev_dependencies:
  flutter_test:
    sdk: flutter

# For information on the generic Dart part of this file, see the
# following page: https://dart.dev/tools/pub/pubspec

# The following section is specific to Flutter.
flutter:

  # The following line ensures that the Material Icons font is
  # included with your application, so that you can use the icons in
  # the material Icons class.
  uses-material-design: true

  # To add assets to your application, add an assets section, like this:
  # assets:
  #   - images/a_dot_burr.jpeg
  #   - images/a_dot_ham.jpeg

  # An image asset can refer to one or more resolution-specific "variants", see
  # https://flutter.dev/assets-and-images/#resolution-aware.

  # For details regarding adding assets from package dependencies, see
  # https://flutter.dev/assets-and-images/#from-packages

  # To add custom fonts to your application, add a fonts section here,
  # in this "flutter" section. Each entry in this list should have a
  # "family" key with the font family name, and a "fonts" key with a
  # list giving the asset and other descriptors for the font. For
  # example:
  # fonts:
  #   - family: Schyler
  #     fonts:
  #       - asset: fonts/Schyler-Regular.ttf
  #       - asset: fonts/Schyler-Italic.ttf
  #         style: italic
  #   - family: Trajan Pro
  #     fonts:
  #       - asset: fonts/TrajanPro.ttf
  #       - asset: fonts/TrajanPro_Bold.ttf
  #         weight: 700
  #
  # For details regarding fonts from package dependencies,
  # see https://flutter.dev/custom-fonts/#from-packages
I left the generated comments but the most important is the list of libraries under the dependencies section. As you can see, in addition to the SDK, I used the http library which provides the http client,flutter_flavor which allows to pass parameters to the application (this way I pass the main API address). The shared_preferences library is also important, it gives access to local storage in the web application, and on other platforms access to application databases.
When writing an application in Flutter, we create the code mainly in the lib and test directory, the rest of the directories are intended for individual platforms and their task is to run the builded code (for the platform). Of course, when developing for mobile platforms, we will probably tweak something platform sepcific source code ,at least some basic configuration.
Let’s start with the main file:
import 'package:flutter/material.dart';
import 'package:flutter_flavor/flutter_flavor.dart';
import 'flutter_api_demo_app.dart';


void main() {
   FlavorConfig(
        name: "DEV",
        color: Colors.red,
        location: BannerLocation.bottomStart,
        variables: {
            "baseApiUrl": "http://localhost:8080",
            "baseKeycloakUrl": "http://localhost:8081",
        },
    );

  runApp(FlutterApiDemoApp());
}
The only curiosity in this file is FalvorConfig which allows us to create various configurations, e.g. PROD, DEV.
Another FlutterApiDemoApp class is mentioned in the runApp method. Let’s take a look at the file flutter_api_demo_app.dart in which this class is located
import 'package:flutter/material.dart';
import 'package:gui/constants/api_path.dart';
import 'package:gui/login_page.dart';
import 'package:gui/models/api_response.dart';
import 'package:gui/services/rest_api_service.dart';
import 'models/server_message.dart';

class FlutterApiDemoApp extends StatelessWidget {
  @override
  Widget build(BuildContext context) {
    return MaterialApp(
      title: 'Flutter with Keycloak Demo',
      theme: ThemeData(
        primarySwatch: Colors.blue,
        visualDensity: VisualDensity.adaptivePlatformDensity,
      ),
      home: UserHomePage(
        username: null,
      ),
    );
  }
}

class UserHomePage extends StatefulWidget {
  UserHomePage({Key key, this.username}) : super(key: key);
  final String title = 'User Home Page';
  final String username;
  @override
  _UserHomePageState createState() => _UserHomePageState();
}

class _UserHomePageState extends State<UserHomePage> {
  String _serverMessage = '';
  Color _serverMessageStyleColor = Colors.blue;

  _fetchSecuredServerMessage() async {
    var apiService = await RestApiService.getInstance();
    final response = await apiService.apiGetSecured<ServerMessage>(
        ApiPath.API_SECURED, (json) => ServerMessage.fromJson(json));
    _updateState(response);
  }

  _fetchNotSecuredServerMessage() async {
    var apiService = await RestApiService.getInstance();
    final response = await apiService.apiGetNotSecured<ServerMessage>(
        ApiPath.API_NOT_SECURED, (json) => ServerMessage.fromJson(json));
    _updateState(response);
  }

  void _updateState(ApiResponse<ServerMessage> response) {
    if (response.code == 200) {
      _updateServerMessage(response.body);
      _updateServerMessageStyleColor(Colors.blue);
    } else {
      final requestFailedMsg =
          "Failed to fetch data from: ${ApiPath.API_SECURED}";
      _updateServerMessage(new ServerMessage(message: requestFailedMsg));
      _updateServerMessageStyleColor(Colors.red);
    }
  }

  void _updateServerMessage(ServerMessage serverMessage) {
    setState(() {
      _serverMessage = serverMessage.message;
    });
  }

  void _updateServerMessageStyleColor(MaterialColor newColor) {
    setState(() {
      _serverMessageStyleColor = newColor;
    });
  }

  @override
  Widget build(BuildContext context) {
    return Scaffold(
        appBar: AppBar(
          title: Text(widget.title),
          leading: GestureDetector(
            onTap: () {
              debugPrint("Future menu");
            },
            child: Icon(
              Icons.menu,
            ),
          ),
          actions: <Widget>[
            Padding(
              padding: EdgeInsets.only(top: 20.0),
              child: Text("Username: ${widget.username}"),
            ),
            Padding(
                padding: EdgeInsets.only(right: 40.0),
                child: GestureDetector(
                  onTap: () {
                    Navigator.push(context,
                        MaterialPageRoute(builder: (context) => LoginPage()));
                  },
                  child: Icon(
                    Icons.portrait,
                    size: 26.0,
                  ),
                ))
          ],
        ),
        body: Center(
          child: Container(
            padding: EdgeInsets.all(20),
            child: Column(
              mainAxisAlignment: MainAxisAlignment.center,
              crossAxisAlignment: CrossAxisAlignment.center,
              children: <Widget>[
                Row(
                  mainAxisAlignment: MainAxisAlignment.center,
                  children: [
                    Column(
                      children: [
                        ElevatedButton(
                          child: Text('Non secured API'),
                          onPressed: () =>
                              _fetchNotSecuredServerMessage(),
                        )
                      ],
                    ),
                    Column(
                      children: [
                        ElevatedButton(
                          child: Text('Secured API'),
                          onPressed: () => _fetchSecuredServerMessage(),
                        )
                      ],
                    )
                  ],
                ),
                Divider(),
                Row(mainAxisAlignment: MainAxisAlignment.center, children: [
                  Text(
                    '$_serverMessage',
                    style: new TextStyle(
                        inherit: true,
                        fontSize: 20.0,
                        fontWeight: FontWeight.bold,
                        decorationStyle: TextDecorationStyle.wavy,
                        color: _serverMessageStyleColor),
                  ),
                ])
              ],
            ),
          ),
        ));
  }
}
The FlutterApiDemoApp class itself is rather simple and just defines the page title and the home part. As you can see I use another class for home part -> UserHomePage which extends StatefulWidget. It is a more complicated one, but I will cover it one by one:
- because it extends
StatefulWidgetwe can overridecreteStatemethod . This method returns_UserHomePageStatewhich is state of theUserHomePage. - the state of our application is two variables:
String _serverMessageandColor _serverMessageStyleColor. There are two methods_updateServerMessageand_updateServerMessageStyleColorthat deal with changing state. - the
_fetchSecuredServerMessageand_fetchNotSecuredServerMessagemethods are used when the buttons on the home page are pressed. (one for the/securedendpoint and the other for/not-secured). They both useRestApiServiceto establish a connection and update the state using a message from the API server and color. Blue in case of success and red in case of failure.
Let’s take a look at the RestApiService service which is used to connect to the API:
import 'dart:convert';

import 'package:flutter/foundation.dart';
import 'package:gui/models/api_response.dart';
import 'package:gui/services/session_storage_service.dart';
import 'package:http/http.dart' as http;
import 'package:http/http.dart';

class RestApiService {
  static RestApiService service;

  static Future<RestApiService> getInstance() async {
    if (service == null) {
      service = RestApiService();
    }
    return service;
  }

  Future<ApiResponse<T>> apiGetSecured<T>(
      Uri uri, T Function(Map<String, dynamic>) fromJson) async {
    final headers = await createAuthHeader();
    if (headers == null) {
      return ApiResponse<T>(body: null, code: 401);
    }
    final response = await http.get(uri, headers: headers);
    return parseResponse(response, fromJson);
  }

  Future<ApiResponse<T>> apiGetNotSecured<T>(
      Uri uri, T Function(Map<String, dynamic>) fromJson) async {
    final response = await http.get(uri);
    return parseResponse(response, fromJson);
  }

  ApiResponse<T> parseResponse<T>(
      Response response, T Function(Map<String, dynamic>) fromJson) {
    if (response.statusCode == 200) {
      final parsedBody = deserialize<T>(response.body, (x) => fromJson(x));
      return ApiResponse<T>(body: parsedBody, code: response.statusCode);
    } else {
      final requestFailedMsg =
          "Failed to fetch data from: ${response.request.url}";
      debugPrint(requestFailedMsg);
      return ApiResponse<T>(body: null, code: response.statusCode);
    }
  }

  T deserialize<T>(
    String json,
    T factory(Map<String, dynamic> data),
  ) {
    return factory(jsonDecode(json) as Map<String, dynamic>);
  }

  Future<Map<String, String>> createAuthHeader() async {
    var sessionStorageService = await SessionStorageService.getInstance();
    var accessToken = sessionStorageService.retriveAccessToken();
    if (accessToken == null) {
      debugPrint("No access token in local storage found. Please log in.");
      return null;
    }
    return {"Authorization": "Bearer $accessToken"};
  }
}
The service is a singleton and hence the getInstance method. There are two important methods apiGetSecured and apiGetNotSecured that are used to connect to the API. The apiGetNotSecured method is simple and just does an http GET request and then parses the server’s response into the ApiResponse class. The second method is more complicated because if we want to connect to a secured endpoint, we must have a JWT token in the headers of that request. The JWT token is added to the header in the createAuthHeader method. The token is extracted in it using the retriveAccessToken method from the SessionStorageService service. Let’s take a look at this service.
import 'package:shared_preferences/shared_preferences.dart';
import 'dart:convert';
import 'package:gui/models/token_model.dart';

class SessionStorageService {
  static SessionStorageService manager;
  static SharedPreferences _prefs;
  static const String ACCESS_TOKEN_KEY = "ACCESS_TOKEN";

  static Future<SessionStorageService> getInstance() async {
    if (manager == null || _prefs == null) {
      manager = SessionStorageService();
      _prefs = await SharedPreferences.getInstance();
    }
    return manager;
  }

  void saveAccessToken(String accessToken) {
    _prefs.setString(ACCESS_TOKEN_KEY, accessToken);
  }

  String retriveAccessToken() {
    var tokenJson = _prefs.getString(ACCESS_TOKEN_KEY);
    if (tokenJson == null) {
      return null;
    }
    return TokenModel.fromJson(jsonDecode(tokenJson)).accessToken;
  }
}
This service is also singleton (like all of them in this applcation). Service uses the shared_preferences library, which allows for reading and writing from local storage for web applications (it can be also use in different platform to save in local database). saveAccessToken method saves token in local storage and retriveAccessToken retrives it from there ![]() Now it is still worth pointing to the place where the
Now it is still worth pointing to the place where the saveAccessToken method is used. It is the login page:
import 'package:flutter/material.dart';
import 'package:gui/flutter_api_demo_app.dart';
import 'package:gui/services/auth_service.dart';

class LoginPage extends StatelessWidget {
  final TextEditingController _usernameController = TextEditingController();
  final TextEditingController _passwordController = TextEditingController();

  void displayDialog(context, title, text) => showDialog(
        context: context,
        builder: (context) =>
            AlertDialog(title: Text(title), content: Text(text)),
      );

  Future<int> attemptLogIn(String username, String password) async {
    var authService = await AuthService.getInstance();
    return authService.authenticateUser(username, password);
  }

  @override
  Widget build(BuildContext context) {
    return Scaffold(
        appBar: AppBar(
          title: Text("Log In Page"),
        ),
        body: Padding(
          padding: const EdgeInsets.all(8.0),
          child: Column(
            children: <Widget>[
              TextField(
                controller: _usernameController,
                decoration: InputDecoration(labelText: 'Username'),
              ),
              TextField(
                controller: _passwordController,
                obscureText: true,
                decoration: InputDecoration(labelText: 'Password'),
              ),
              ElevatedButton(
                  onPressed: () async {
                    var username = _usernameController.text;
                    var statusCode =
                        await attemptLogIn(username, _passwordController.text);
                    if (statusCode == 200) {
                      Navigator.push(
                          context,
                          MaterialPageRoute(
                              builder: (context) =>
                                  UserHomePage(username: username)));
                    } else {
                      displayDialog(context, "Something went wrong",
                          "No account was found matching that username and password");
                    }
                  },
                  child: Text("Log In")),
            ],
          ),
        ));
  }
}
It is a very simple widget. It displays the input fields for username and password, and after pressing the Log In button, the method attemptLogIn is triggered. If login is successful, you will be redirected to UserHomePage with your username, if not message is displayed. The attemptLogIn method uses the service AuthService which I will describe now.
import 'package:flutter/foundation.dart';
import 'package:gui/constants/api_path.dart';
import 'package:gui/services/session_storage_service.dart';
import 'package:http/http.dart' as http;

class AuthService {
  static AuthService service;

  static Future<AuthService> getInstance() async {
    if (service == null) {
      service = AuthService();
    }
    return service;
  }

  Future<int> authenticateUser(String username, String password) async {
     var res = await http.post(ApiPath.KEYCLOAK_AUTH, headers: {
      "Content-Type": "application/x-www-form-urlencoded"
    }, body: {
      "username": username,
      "password": password,
      "client_id": "login-app",
      "grant_type": "password"
    });

    if (res.statusCode == 200) {
      var sessionStorageService = await SessionStorageService.getInstance();
      sessionStorageService.saveAccessToken(res.body);
      return res.statusCode;
    } else {
      debugPrint(
          "An Error Occurred during loggin in. Status code: ${res.statusCode} , body: ${res.body.toString()}");
      return res.statusCode;
    }
  }
}
This service has one method and one task, to authenticate the user in Keycloak and, if successful, save the JWT token.
I have described the entire code. I did not paste the code of the DTO models and the class containing constant fields used by services. You can see it in my repository ![]()
Using VS Code Remote - Containers extension to develop flutter app
In order not to have to install Flutter on my system and be able to easily transfer the project to another computer, I added the Dockerfile_dev file to the project with the appropriate Flutter configuration, thanks to which I can use the Visual Studio Code Remote - Containers extension. This extension lets you use a Docker container as a full-featured development environment. You can read more about it on this page. The mentioned Dockerfile_dev file looks like this:
FROM ubuntu:20.04
ARG DEBIAN_FRONTEND=noninteractive

ENV FLUTTER_WEB_PORT="8090"
ENV FLUTTER_DEBUG_PORT="42000"

# Prerequisites
RUN apt-get update && apt-get install -y unzip xz-utils git openssh-client curl && apt-get upgrade -y

# Install flutter beta
RUN curl -L https://storage.googleapis.com/flutter_infra/releases/stable/linux/flutter_linux_2.0.1-stable.tar.xz | tar -C /opt -xJ

ENV PATH="$PATH":"/opt/flutter/.pub-cache/bin:/opt/flutter/bin"

# Enable web capabilities
RUN flutter upgrade
RUN flutter update-packages
As you can see, there is nothing unusual here, we download FLutter and update packages.
It is also necessary to configure the VS Code extension. It is located in the file .devcontainer/devcontainer:
{
	"name": "Flutter",
	"dockerFile": "../Dockerfile_dev",
	"extensions": [
		"dart-code.dart-code",
		"dart-code.flutter",
		"k--kato.intellij-idea-keybindings"
	],
	"runArgs": [],
	"postCreateCommand": "flutter pub get"
}
We indicate in it the Dockerfile that we want to use and needed VS Code extensions which we will also use during development. There is also postCreateCommand which runs flutter pub get command (install packages) after container is created. There are many more configuration options - take a look at the documentation on the page I mentioned above.
To run the docker configuration using the extension, click the green icon in the lower left corner of VS Code:
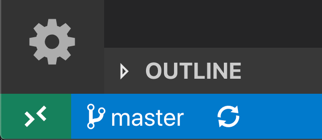
There is no difference when developing with Visual Studio Code Remote - Containers extension. If, for example, we want to run the Flutter application in debug mode, all we have to do is install the Dart Debug Extension in Chrome. To run the application use following launch command:
flutter run -d web-server --web-port $FLUTTER_WEB_PORT
FLUTTER_WEB_PORT is set to 8090 in Dockerfile_dev so if you use VS Code extension then your application will start using this port.
If you want to debug please use the added launch configuration:
{
    "version": "0.2.0",
    "configurations": [
        {
            "name": "flutter-dart DEBUG",
            "request": "launch",
            "type": "dart",
            "program": "lib/main.dart",
            "args": [
                "-d",
                "web-server",
                "--web-port",
                "$FLUTTER_WEB_PORT",
                "--web-enable-expression-evaluation"
            ]
        }
    ]
}
Sometimes VS Code shows you errors in the code, click on the Remote-Containers extension icon and click on Reopen ... this should help (you can also ignore them when you want to just run the application).
In the directory with flutter project I have also included the Dockerfile configuration which allows you to build and run the builded project:
# Stage 1 : build production code
FROM ubuntu:20.04 AS build
ARG DEBIAN_FRONTEND=noninteractive
## Prerequisites
RUN apt-get update && apt-get install -y unzip xz-utils git openssh-client curl && apt-get upgrade -y

## Install flutter beta
RUN curl -L https://storage.googleapis.com/flutter_infra/releases/stable/linux/flutter_linux_2.0.1-stable.tar.xz | tar -C /opt -xJ
ENV PATH="$PATH":"/opt/flutter/.pub-cache/bin:/opt/flutter/bin"

COPY . /app
WORKDIR /app/

RUN flutter build web

## Stage 2 : create the docker final image
FROM nginx:alpine
WORKDIR /usr/share/nginx/html
COPY --from=build /app/build/web ./
COPY nginx/nginx.conf /etc/nginx/nginx.conf
This is multistage configuration. First part prepares Flutter environment and build application and then second part is Nginx server with basic configuration used to run this build. To build a project image simply run following command:
docker build -t flutter-kotlin-gui .
Spring Boot API application
The application acting as the project API is written with Kotlin and Spring Boot 2 using the Spring WebFlux module. The application has two endpoints:
import org.springframework.security.access.prepost.PreAuthorize
import org.springframework.web.bind.annotation.GetMapping
import org.springframework.web.bind.annotation.RestController
import reactor.core.publisher.Mono

@RestController
class ApiController {

    @PreAuthorize("permitAll()")
    @GetMapping("/not-secured")
    fun getNonSecuredMessage() = Mono.just(ApiResponse("Server return non secured message"))

    @PreAuthorize("hasRole('USER')")
    @GetMapping("/secured")
    fun getSecuredMessage() = Mono.just(ApiResponse("Server return SECURED message"))
}
As you can see one of them is secured and one permits all connections. Security configuration using JWT tokens for an application using WebFlux should looks as follows:
import org.slf4j.LoggerFactory
import org.springframework.context.annotation.Bean
import org.springframework.security.config.annotation.method.configuration.EnableReactiveMethodSecurity
import org.springframework.security.config.annotation.web.reactive.EnableWebFluxSecurity
import org.springframework.security.config.web.server.ServerHttpSecurity
import org.springframework.security.oauth2.server.resource.authentication.ReactiveJwtAuthenticationConverterAdapter
import org.springframework.security.web.server.SecurityWebFilterChain
import org.springframework.web.cors.reactive.CorsWebFilter

import org.springframework.web.cors.CorsConfiguration
import org.springframework.web.cors.reactive.UrlBasedCorsConfigurationSource


/**
 * For Reactive web applications (WebFlux)
 **/
@EnableWebFluxSecurity
@EnableReactiveMethodSecurity
class ReactiveSecurityConfig {

    private val log = LoggerFactory.getLogger(this.javaClass)

    @Bean
    fun springSecurityFilterChain(http: ServerHttpSecurity): SecurityWebFilterChain? {
        log.info("Customizing security configuration (reactive)")
        http
            .authorizeExchange { exchanges ->
                exchanges
                    .anyExchange().permitAll()
            }
            .oauth2ResourceServer { oauth2ResourceServer ->
                oauth2ResourceServer
                    .jwt { jwt ->
                        jwt.jwtAuthenticationConverter(
                            ReactiveJwtAuthenticationConverterAdapter(
                                KeycloakRealmRoleConverter()
                            )
                        )
                    }
            }
        return http.build()
    }
An important point is setting jwt.jwtAuthenticationConverter(ReactiveJwtAuthenticationConverterAdapterKeycloakRealmRoleConverter()). KeycloakRealmRoleConverter allows to extract roles from a JWT token:
import org.springframework.security.core.authority.SimpleGrantedAuthority
import org.springframework.security.oauth2.jwt.Jwt
import org.springframework.security.oauth2.server.resource.authentication.JwtAuthenticationConverter
import java.util.Collections.emptyList
import java.util.Collections.emptyMap

class KeycloakRealmRoleConverter : JwtAuthenticationConverter() {
    private val authorityPrefix = "ROLE_"

    override fun extractAuthorities(jwt: Jwt): Collection<SimpleGrantedAuthority> {
        val authorities = jwt.claims["realm_access"] as Map<String, List<String>>? ?: emptyMap()
        return authorities.getOrDefault("roles", emptyList())
            .map { roleName -> "$authorityPrefix${roleName.toUpperCase()}" }
            .map { role -> SimpleGrantedAuthority(role) }
    }
}
I also added a simplified CORS filter configuration that allows you to connect from any foreign domain (*). Of course, this settung is not recommended and should be adjusted in production environment ![]() :
:
import org.springframework.context.annotation.Configuration
import org.springframework.web.reactive.config.CorsRegistry
import org.springframework.web.reactive.config.EnableWebFlux
import org.springframework.web.reactive.config.WebFluxConfigurer


@Configuration
@EnableWebFlux
class CorsGlobalConfiguration : WebFluxConfigurer {
    override fun addCorsMappings(corsRegistry: CorsRegistry) {
        corsRegistry.addMapping("/**")
            .allowedOrigins("*")
            .allowedMethods("PUT", "GET", "POST")
            .maxAge(3600)
    }
}
I’ve also pushed some sample configuration for a project that does not use WebFlux (pl.codeaddict.flutterapi.config.nonreactive package) to repository.
In addition to the above classes, there are two more in the API project. First one serves as an endpoints response:
data class ApiResponse(val message: String
And the second one is just the main class for this application:
import org.springframework.boot.autoconfigure.SpringBootApplication
import org.springframework.boot.runApplication

@SpringBootApplication
class FlutterApiApplication

fun main(args: Array<String>) {
	runApplication<FlutterApiApplication>(*args)
}
Ok, lets have a look at application.yml:
spring:
  security:
    oauth2:
      resourceserver:
        jwt:
          jwk-set-uri: http://localhost:8081/auth/realms/kotlin-flutter-demo-realm/protocol/openid-connect/certs

logging:
  level:
    org.springframework:
      security: INFO
The first part is quite important. We are configuring the endpoint url that allows us to check the signature of the JWT token. Keycloak provides such an endpoint. The configuration for this is also added in docker-compose.yml file. Second part of the configuration is there to setup logging level in case of any troubles with security.
Last but not least project gradle configuration:
import org.jetbrains.kotlin.gradle.tasks.KotlinCompile

plugins {
	id("org.springframework.boot") version "2.4.2"
	id("io.spring.dependency-management") version "1.0.11.RELEASE"
	id("com.google.cloud.tools.jib") version "2.7.1"

	kotlin("jvm") version "1.4.21"
	kotlin("plugin.spring") version "1.4.21"
}

group = "pl.codeaddict"
version = "0.0.1-SNAPSHOT"
java.sourceCompatibility = JavaVersion.VERSION_11

repositories {
	mavenCentral()
}

dependencies {
	implementation("org.springframework.boot:spring-boot-starter-webflux")
	implementation("com.fasterxml.jackson.module:jackson-module-kotlin")
	implementation("io.projectreactor.kotlin:reactor-kotlin-extensions")
	implementation("org.jetbrains.kotlin:kotlin-reflect")
	implementation("org.jetbrains.kotlin:kotlin-stdlib-jdk8")
	implementation("org.jetbrains.kotlinx:kotlinx-coroutines-reactor")
	implementation("org.springframework.boot:spring-boot-starter-oauth2-resource-server")

	testImplementation("org.springframework.boot:spring-boot-starter-test")
	testImplementation("io.projectreactor:reactor-test")
}

tasks.withType<KotlinCompile> {
	kotlinOptions {
		freeCompilerArgs = listOf("-Xjsr305=strict")
		jvmTarget = "11"
	}
}

tasks.withType<Test> {
	useJUnitPlatform()
}

jib {
	from {
		image = "gcr.io/distroless/java-debian10:11"
	}
	to {
		image = "flutter-kotlin-api"
	}
	container {
		jvmFlags = listOf("-Duser.timezone=UTC")
		ports = listOf("8080")
		creationTime = "USE_CURRENT_TIMESTAMP"
	}
}
There is probably nothing special here except maybe jib plugin that allows to easily build a docker image with the application.
You can run application using Spring Boot plugin:
./gradlew bootRun
or build docker image using jib:
./gradlew jibDockerBuild
The project requires Java version >= 11.
Running whole project
If you build all the docker images following the instructions in the above sections, you can run all parts of the project (API, GUI, Keycloak) with one command issued in the root of the project:
docker-compose up
The application graphic interface should look like this:
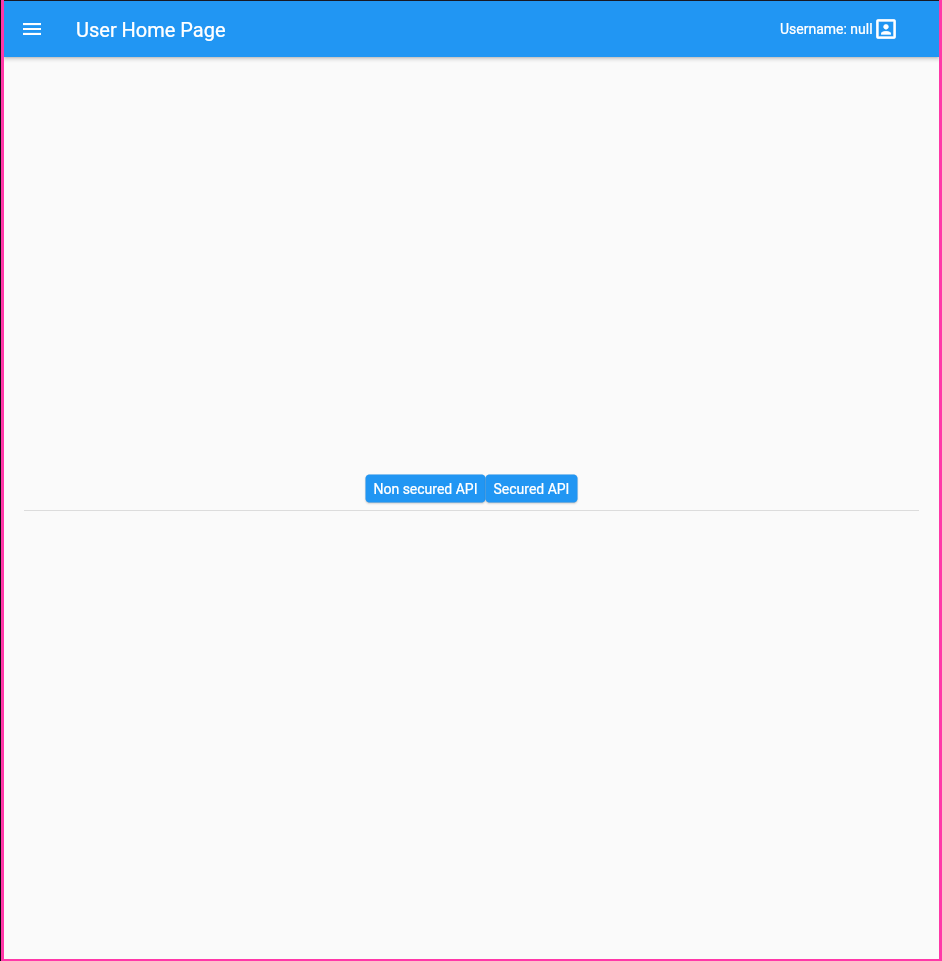
There are two buttons in the middle. One runs the endpoint /secured and the second is for/not-secured endpoint. In the upper right corner you can see the username, which if the user is not logged in is null (yes, I know it’s ugly ![]() ). There is an icon next to the
). There is an icon next to the username that leads to the login page.
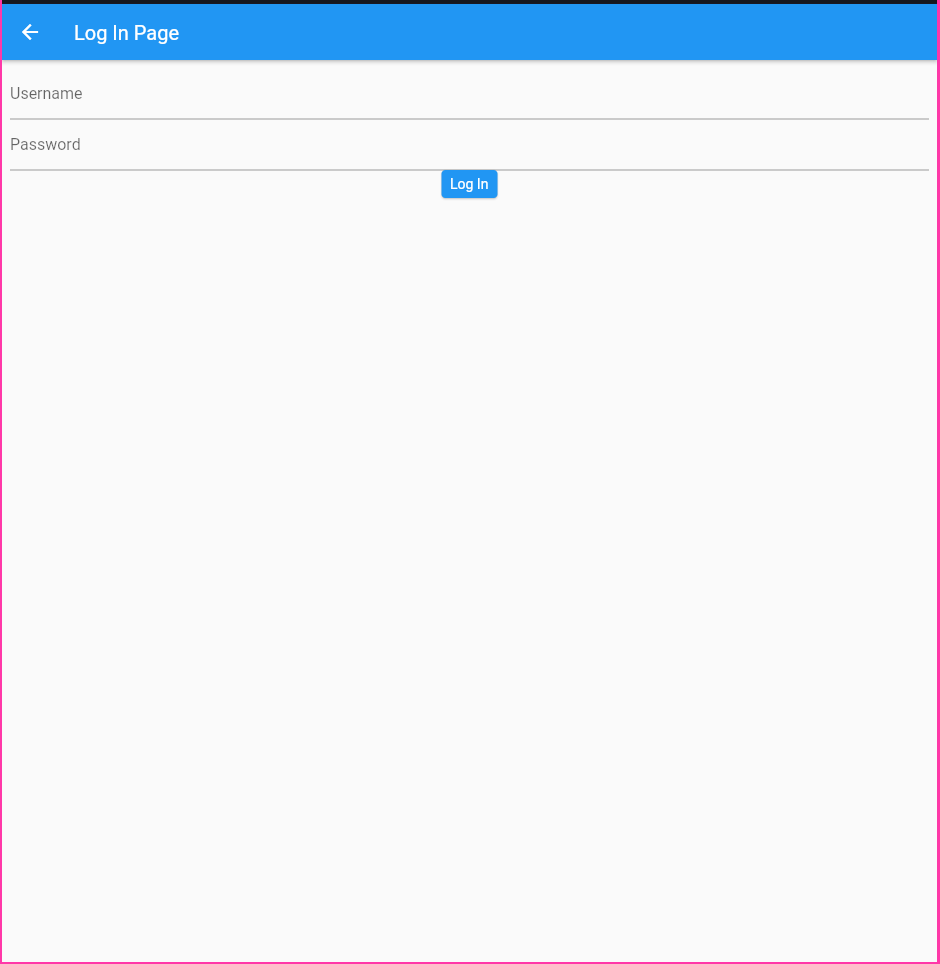
If you click on the icon next to the username, you will be taken to the login page. You can login using the user data added in Keycloak in our imported realm configuration (username -> user , password -> password).
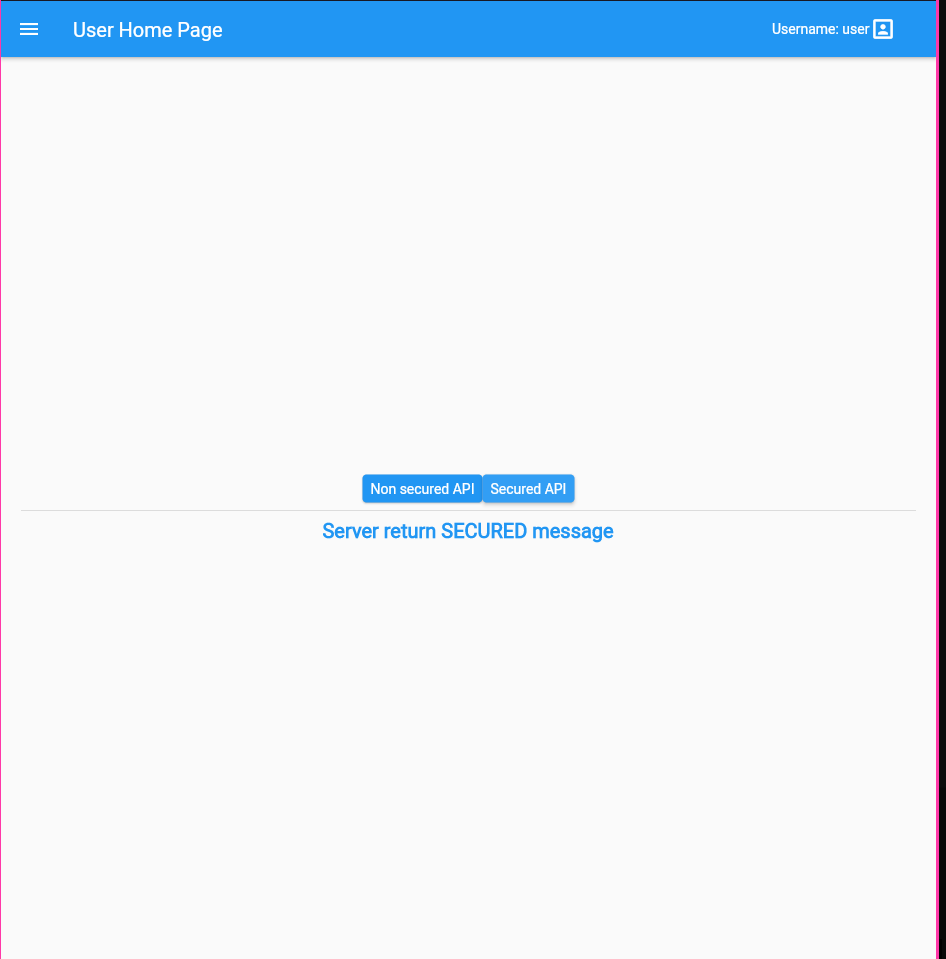
After logging in successfully, you will be redirected back to the home page where you can try out if /secured endpoint is accessible.
As an extra, in the curl-scripts directory, I created some useful curl scripts that calls to the secured and insecure API. Thanks to them, you can check the authentication in application and Keycloak API operation. There is also a script that refreshes ACCESS TOKEN using REFRESH TOKEN (I did not implement it in the application), so you can play around fit it.
What is missing in this project
Certainly many things ![]() . But it wasn’t my goal to implement everything. I think the most important shortcomings are:
. But it wasn’t my goal to implement everything. I think the most important shortcomings are:
- user after clicking on endpoint
/securedshould be probably automatically taken to login page. - JWT token expires after some time (can be set in Keycloak), and should be refreshed using refresh token.
- the token is stored in local storage, it is not an ideal solution in terms of security.
Summary
This is it! You can find all the source code in my repository GitHub account. Have fun and thanks for reading!